We Built an AI Headshot Tool for Real Estate, Here’s Why and How to Use It
At A.CRE, we have always been about training the industry.
For the past decade, that has largely meant financial modeling. We’ve built and shared Excel models that have been downloaded over 600,000 times, because learning to model real estate cash flows is a leveraged skill for your career.
Today, AI is starting to feel very similar. It is a technical skill with real career leverage. You can either watch it from the sidelines, or you can start building with it.
Our new AI Headshot Studio by AI.Edge is a small, practical example of what “AI-native” looks like in practice. We took a real pain point, built a tool quickly, and are now sharing it with the community.
Try the tool here:AI Headshot Studio

This tool was created in ~8 hours in Replit by the AI.Edge team as part of our Q4 Build Competition
Why We Built It: AI.Edge, Build Competitions, And A Universal Pain Point
There are really two origin stories here.
AI.Edge by A.CRE Build Competitions
AI.Edge build competitions usually start the same way: with a simple question from the community.
Inside AI.Edge, the best AI course and community in real estate, we spend most of our time helping CRE professionals become AI native. We do that by sharing what matters in AI for CRE, giving members hands-on training, and building practical tools that save time and money.
Every few months, we turn that mindset into a friendly build competition. Members set out to create “AI multipliers” that cut busywork, reduce costs, or meaningfully increase output. The A.CRE team joins in as well, not to chase prizes, but to stay honest about what it really takes to ship working tools. It keeps us in the habit of building, not just talking, and it lets us turn real questions from the community into real applications.
The AI Headshot Studio grew out of one of these internal builds. What started as, “Could we quickly solve this headshot problem with AI?” turned into a concrete example we could put in front of members to say, “Here is what AI native looks like in practice.”
Headshots As a Universal Pain
The second part of the origin story is simpler. Headshots are a universal pain!
- Professional shoots are expensive and take time to schedule.
- Team pages rarely look consistent.
- People change firms, titles, and looks faster than their headshots are updated.
- Students and career-switchers often know they need a better headshot, they just do not know how to get there affordably.
One of our first Skill Drops in AI.Edge taught members to fine tune a flux.1 image model specifically for headshots. The response was strong. Many members followed along and built their own experiments.
So, we took that concept and asked, “What if we wrapped this in a real app, with a friendly UI, strong privacy posture, and pricing that fits what A.CRE has always done?”
AI Headshot Studio is the result.
What Is AI Headshot Studio?
AI Headshot Studio is a web app we built at A.CRE using an AI coding and hosting platform called Replit. The app seeks to solve a very specific problem: help real estate professionals and teams create professional looking headshots quickly, consistently, and at very low or no cost.
Here is what it does in practice:
- You upload or capture a handful of selfies or webcam photos.
- The app fine tunes a model on your face in the background.
- You choose from a set of professional headshot styles that match your use case.
- The system generates a batch of consistent headshots in about 60 to 90 seconds.
The output is meant to plug directly into the places you already show up professionally:
- LinkedIn profiles
- Conference or event speaker bios
- University or program profiles
- Company websites and team pages
- Marketing decks, pitch books, and external materials
Underneath the technology, the goal is very simple: fast, consistent, repeatable headshots, without the usual friction of scheduling, coordinating, and paying for a traditional shoot.

How AI Headshot Studio Works: A Simple User Journey
Here is the basic flow from a user’s perspective.
1. Create An Account (Privacy First)
You start by creating an account in the Studio.
- Accounts are privacy-driven, which means:
- Your reference and AI photos are siloed to your account.
- You control what is saved and what is deleted.
Login is passwordless:
- Enter your email.
- Receive a magic link.
- Click the link to sign in.
No passwords to remember, and no separate identity system to manage.
2. Add Reference Photos
Once inside the Studio, your first job is to add reference images of yourself. You have two options:
- Webcam capture
- The fastest and easiest method.
- The app prompts you to take a series of photos right from your browser.
- Upload selfies
- If you already have recent selfies in good lighting, you can upload those instead.
A few tips for best results:
- Aim for 4 to 8 photos, with a minimum of 3 to 5.
- Use good lighting (natural light or a well lit room).
- Be well kept and presentable.
- Style your hair and clothing the way you want to appear in the final headshots.
The system uses these images to learn what you look like and to generate consistent headshots across different styles.
3. Choose A Headshot Style
Next, you select from six headshot templates that map to common CRE use cases:
- Executive Office Headshot. Classic, professional, “firm website or leadership page” look.
- Broker on the Move Urban. Modern, city forward feel with an energetic, on the go professional tone.
- Clean Studio Headshot. Neutral, consistent, studio style background that is very LinkedIn friendly.
- PropTech Founder Modern Creative. Contemporary, founder or creator vibe suitable for proptech, startups, and innovators.
- Thought Leader Lifestyle. More natural and approachable, great for speaker bios and content creators.
- Out of Office Headshot. Slightly more casual, still professional, with a “human” and approachable feel.
Within each template, you can tweak a few key elements:
- Outfit type
- Outfit color palette
- Background
These controls keep the output aligned with your firm’s brand or your personal style, while the model maintains facial consistency.
4. Choose Output Settings
You then set your output preferences:
- Number of images per run
- Generate 1 to 3 images per run, depending on how many options you want.
- Aspect ratio
- Square
- Portrait
- Standard
This makes it straightforward to produce:
- A square headshot for LinkedIn.
- A portrait orientation image for conference bios.
- A standard ratio for internal directories.
5. Generate Headshots
Once everything is set:
- Click “Generate Headshot.”
- Wait about 60 to 90 seconds in most cases.
- Your results appear in the Headshots Gallery.
From there, you can:
- Review and edit each generated image.
- Save the ones you like.
- Discard anything that is not quite right.
6. Save, Edit, And Manage Your Images
Inside the Studio, you have a few additional tools and controls:
- Saving and retention
- Unsaved reference photos and generated headshots are automatically deleted within 24 hours.
- Any image you explicitly save remains in your Studio.
- Built in editor
- Basic tools such as cropping.
- Quick refinements before you download or use the image.
- Account controls
- My Account page to manage your plan and credits.
- Ability to delete your account if you choose.
- Getting Started Guide for first time users.
- Support link if you run into issues.
The idea is to keep the experience simple and self-contained, while staying transparent about how your images are handled.
Pricing: Free To Start, De Minimis to Support
Since creating A.CRE over 10 years ago, our instinct has been to share first and charge lightly. That is how we approach financial models, and it is how we are approaching AI tools.
Over the years, the community has downloaded our models hundreds of thousands of times and used a large (and continuously growing) collection of free content and tools. At the same time, there is a real cost under the hood here. Each headshot generation uses modern AI infrastructure and runs at roughly $0.50 per image in compute.
To reconcile those two realities, we started with a simple rule: everyone should be able to use this for free.
- Every new user receives 10 free credits, which translates to 10 headshots at no cost to get value from the tool.
If you find yourself coming back to it, or if your team wants to use it more broadly:
- You can opt into a low-cost subscription or purchase additional credits.
- Pricing is intentionally de minimis relative to the value, and any paid usage goes right back into:
- Covering hosting and compute
- Funding new features
- Building the next tool we share with the community
Just as with our Excel models, the guiding principle is the same: support the community first, and price it in a way that makes it sustainable to keep building.
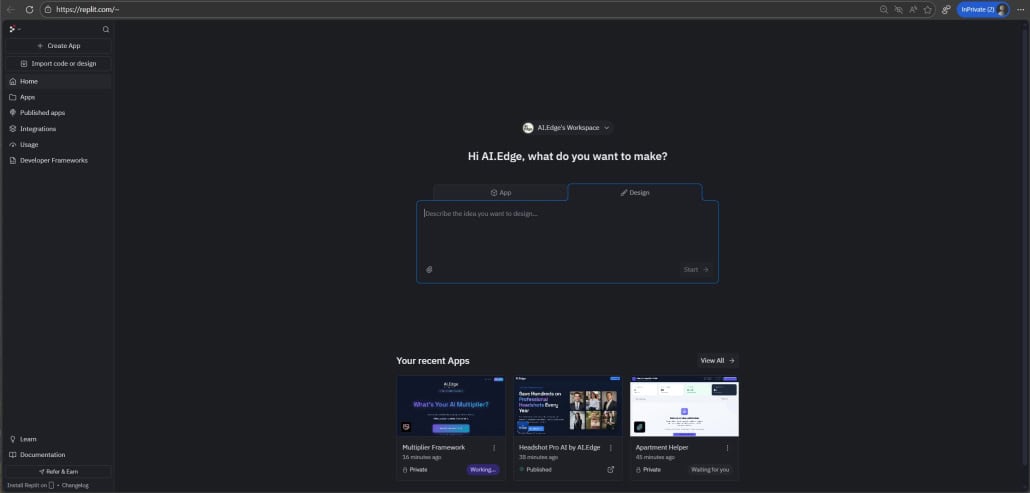
How We Built It in Replit (In About 8 Hours)
One of the reasons we are sharing this so openly is that the build story itself is instructive.
In total, a couple of contributors spent roughly 8 hours of combined time building AI Headshot Studio in Replit, with an estimated build cost of 50 to 100 dollars in Replit credits (likely closer to 50).
That effort produced:
- A professional user interface
- Strong privacy posture and account level controls
- User accounts with passwordless login
- Payment integration for subscriptions and credits
- Built in image editing
- A stable, hosted deployment
None of this required a large engineering team. It was built by people with domain expertise in CRE and AI, supported by tools like Replit and modern AI coding assistants.
The Workflow We Used in Replit
At a high level, the Replit workflow looked like this:
- Start in Design mode
- Sketch the UI and user journey first.
- Make sure the flow, pages, and states feel right before writing logic.
- Use an LLM outside Replit for ideation
- Use tools like ChatGPT, Gemini, or Claude to brainstorm and refine prompts and architecture.
- Do this outside Replit so you do not burn Replit credits on early ideas.
- Switch to Build mode
- Move from design to implementation.
- Let Replit’s AI help scaffold components and connect front end to back end.
- Use Plan mode before major Build actions
- Plan mode helps you preview changes and reduce wasted credits.
- We used a Plan → Build cycle repeatedly to iterate safely.
- Repeat Plan → Build until MVP
- Each cycle improved the experience: privacy logic, headshot templates, account controls, pricing, and so on.
The broader takeaway is important:
Subject matter experts can now ship real software.
You do not have to wait for a large development team. If you understand a problem in CRE deeply, tools like Replit and modern AI assistants make it possible to turn that insight into working software relatively quickly.
To help others on that path, we will also share a Replit referral link:
If you want to build your own tool, use the A.CRE Replit referral link (click here), you will get $10 in credit, and A.CRE gets $10 in credit to help fund the next build we share.


