Supercharge Excel with the ‘Excel 4 CRE’ Add-In – Now with AI (Updated Jan 2026)
Today, we’re thrilled to share with the A.CRE community a new timesaving (and free) Excel tool: the ‘Excel 4 CRE’ Add-in! Over the past few years, we at A.CRE (together with various AI coding tools) have been developing and sharing this Excel add-in.
The goal? To make real estate financial modeling faster and more efficient by automating common tasks and eliminating repetitive workflows. And we’re just getting started. With new AI features and other enhancements based on feedback from you, the add-in continues to evolve, adding new features that make your modeling work even smoother.
In this post, you’ll find everything you need to download, install, and start using the Excel 4 CRE Add-in—including written and video tutorials. We’d love to hear your feedback as you test it out, so let us know what works, what doesn’t, and what you’d like to see next!
- Note: We’re continuously improving this tool, and it’s already in beta version 0.11.x—with 24 releases as of January 2026. While the A.CRE team runs a version or two ahead of public releases, the Excel 4 CRE Add-in is still a work in progress and may contain errors. We encourage you to use it, provide feedback, and, as always, proceed at your own risk.
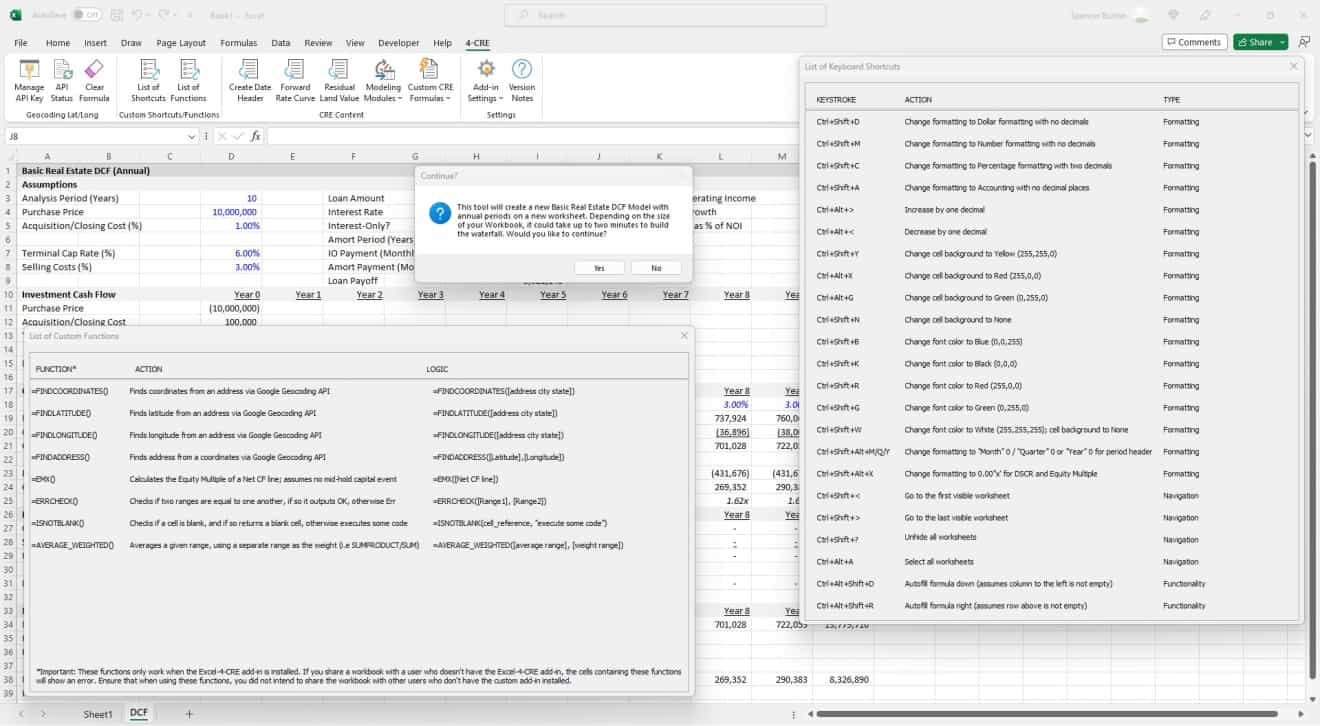
Screenshot of the ‘Excel 4 CRE’ add-in, beta v0.9.x
What is an Excel Add-in?
In case you’re unfamiliar with an Excel add-in. An add-in is a software program designed to extend the functionality of Microsoft Excel. Packaged as an .xlam file type, it is essentially a separate program that integrates with Excel and provides additional features and capabilities beyond what is built into the standard Excel software.
Add-ins can be created by Microsoft, third-party developers, or even users themselves using programming languages like VBA (Visual Basic for Applications). They can range from simple utilities that automate repetitive tasks to complex tools that perform advanced data analysis or integrate with external data sources.
Examples of popular Excel add-ins you may be familiar with include Solver (which helps find optimal solutions to mathematical problems), Analysis ToolPak (which provides statistical analysis functions), and Power Query (which allows users to connect and transform data from various sources).
Download the ‘Excel 4 CRE’ Add-in
This Excel add-in is provided free of charge as a service to the CRE industry, with all code openly viewable/editable via the VBA Project section of Excel. By downloading this add-in, you:
- agree to the A.CRE Terms and Condition of Use,
- acknowledge that this Excel add-in likely contains errors,
- acknowledge that A.CRE is unable to provide you with support for this free Excel add-in and that you will install the add-in on your own and at your own risk, and
- acknowledge that this Excel add-in is ONLY compatible with Excel for PC; it is NOT compatible with Excel for Mac or web versions of Excel. Additionally, the add-in is NOT compatible with custom Quick Access Toolbar settings, reverting any custom changes to the Quick Access Toolbar to default.
I should note that while we do not provide support for the add-in, we have created an experimental custom GPT assistant for this add-in that you might try. You can find that here: https://chatgpt.com/g/g-POtIcMhPU-excel-4-cre-add-in-assistant (ChatGPT account required).
What’s Included in the ‘Excel 4 CRE’ Add-in and What’s Coming
As of the current release, the ‘Excel 4 CRE’ Add-in includes:
- Custom ribbon item called 4-CRE that appears upon installation.
- Tools to connect with Google’s Geocoding API and auto-populate latitude/longitude/address via several custom functions.
- Various custom Excel shortcuts widely used by commercial real estate finance professionals.
- Custom Excel functions specific to CRE professionals (note that the functions do NOT work when used in Excel without this add-in; only use these functions in workbooks you don’t intend to share)
- A feature to automatically generate a two or three row date header.
- Residual land valuation calculation tool.
- Quick ‘Modeling Modules’ feature that creates a 2-tier equity waterfall, basic real estate DCF, and dynamic amortization table with the click of a button.
- A formula intelligence toolkit that performs a worksheet-level error check of all formulas and performs advanced formula auditing (i.e. a list of the precedents and dependents of a formula)
- Reset Cursor feature that when activated, automatically moves the cursor to cell A1 on all worksheets upon open.
- Quick links to A.CRE resources.
- One-click CRE models and modules (‘Modeling Modules’)
- One-click CRE formulas (‘Custom CRE Formulas’)
- A convenient uninstall feature to easily remove the add-in.
- Free AI features including ‘Explain Formula’, ‘Write Formula’, and ‘Ask an Excel Question’
- A changelog and documentation.
In our development roadmap, we have the following upcoming features:
- Additional modeling modules.
- Ability to create custom keyboard shortcuts and/or change existing custom shortcuts.
Features as of Beta v0.5
Features as of Beta v0.8.1
How the ‘Modeling Modules’ Feature was Created Using ChatGPT with Code Interpreter
How to Install the ‘Excel 4 CRE’ Add-in (PC Only)
To install the add-in in Excel for PC, simply follow these steps:
- Download the .ZIP file that contains the Excel-4-CRE.xlam add-in file and save it to your computer.
- Unzip the .ZIP file and save the contents of the file (.xlam + .txt files) to a permanent location on your computer. It’s important that the Excel-4-CRE.xlam file is saved to a permanent location on your computer.
- Open Microsoft Excel.
- Click on the “File” menu at the top left corner of the Excel window.
- Select “Options” from the left-hand side menu.
- In the Excel Options dialog box, select “Add-Ins” from the left-hand side menu.
- At the bottom of the screen, next to the “Manage” dropdown menu, select “Excel Add-ins” and click “Go”.
- In the Add-Ins dialog box, click “Browse”.
- Navigate to the location where you saved the add-in file.
- Before selecting the file, right-click on the file and click ‘Properties’.
- In the Properties dialog box, click the “Unblock” button next to the “Security” message in the lower-right hand corner of the Properties dialog box. Note that in some cases the ‘Unblock’ option does not appear. In that case, simply close the Properties dialog box and continue.
- Now select the file and click “OK”.
- The add-in should now be listed in the Add-Ins dialog box. Make sure the checkbox next to the add-in name is selected and click “OK”.
- If the add-in contains macros, Excel may display a warning message stating that the file contains macros and asking whether to enable them. Click “Enable Macros” to allow the add-in to function properly.
- A custom ribbon item entitled 4-CRE will appear along the top of the Excel window. If that custom ribbon item does not appear, the add-in has not been installed properly.
Assuming the custom ribbon (4-CRE) appears, the add-in is now installed and functioning properly in Excel. If you have trouble installing the add-in, refer to Microsoft Excel’s documentation for adding and removing add-ins.
How to Upgrade the ‘Excel 4 CRE’ Add-in (PC Only)
In beta v0.6, we made it easier to upgrade to the latest version of the add-in. To upgrade the add-in in Excel for PC, simply follow these steps:
- Ensure that Excel is closed.
- Download the latest version of the Add-in. The download is a .ZIP file that contains the Excel-4-CRE.xlam add-in file as well as an Instructions.txt file.
- Save the .ZIP file to a temporary location on your computer.
- Unzip the .ZIP file and copy the newly unzipped Excel-4-CRE.xlam file.
- Locate the permanent location of your existing Exce-4-CRE.xlam file (i.e. the old version).
- Paste the newly unzipped ‘Excel-4-CRE.xlam’ to the permanent location containing your existing file.
- Windows will ask whether to ‘Replace or Skip Files’; choose ‘Replace the file in the destination’.
- You have now overwritten the old version of the add-in for the new version.
- Right-click on the newly overwritten file and click ‘Properties’.
- In the Properties dialog box, click the “Unblock” button next to the “Security” message in the lower-right hand corner of the Properties dialog box. Note that in some cases the ‘Unblock’ option does not appear. In that case, simply close the Properties dialog box and continue.
- Open Excel and navigate to the 4-CRE ribbon (note that if the 4-CRE ribbon does NOT appear, the add-in a) may not be activated – follow the installation instructions above for how to activate the add-in, b) the Unblock in the Properties dialog box wasn’t completed correctly, or c) the add-in was not installed correctly).
- Click the ‘Version Notes’ button under Settings of the 4-CRE ribbon to ensure the add-in has been updated successfully.
The add-in should now be upgraded to the latest version and functioning properly in Excel. If you have trouble installing the add-in, refer to Microsoft Excel’s documentation for adding and removing add-ins.
How to Use the ‘Excel 4 CRE’ Add-in
The ‘Excel 4 CRE’ Add-in expands the functionality of Excel in a variety of ways. Below find instructions for using the features currently available in the add-in. As time permits, and based on user feedback, we will continue to add new features to the add-in.

Section: ‘Geocoding Lat/Long’
Using the Auto Latitude and Longitude (Google Geocoding) Feature
This add-in includes the features in our standard alone A.CRE Geocoding Excel Add-in – an Add-in used by real estate and non-real estate professionals like. If you have that add-in installed, installing this new add-in should automatically uninstall the Geocoding Add-in such that they don’t conflict.
To learn how to use this add-in for auto-populating latitude and longitude coordinates (or getting an address from a latitude/longitude coordinate), follow the instructions here:
https://www.adventuresincre.com/geocoding-excel-add-in/
Note that while the instructions above may refer to the A.CRE Geocoding Excel Add-in, the process to activate and use the Geocoding features in the ‘Excel 4 CRE’ add-in are identical.
Section: ‘Custom Shortcuts/Functions’
Using the CRE Shortcuts
The add-in expands the keyboard shortcuts available in Excel to include various shortcuts common in financial modeling. You can find the entire list of shortcuts by clicking the ‘Shortcuts’ button in the 4-CRE ribbon in Excel or by referring to the list below:
| Keystroke | Action | Type |
| Ctrl+Shift+D | Change formatting to Dollar formatting with no decimals | Formatting |
| Ctrl+Shift+M | Change formatting to Number formatting with no decimals | Formatting |
| Ctrl+Shift+C | Change formatting to Percentage formatting with two decimals | Formatting |
| Ctrl+Shift+A | Change formatting to Accounting formatting with no decimals | Formatting |
| Ctrl+Alt+> | Increase by one decimal | Formatting |
| Ctrl+Alt+< | Decrease by one decimal | Formatting |
| Ctrl+Shift+Y | Change cell background to Yellow (255,255,0) | Formatting |
| Ctrl+Alt+X | Change cell background to Red (255,0,0) | Formatting |
| Ctrl+Alt+G | Change cell background to Green (0,255,0) | Formatting |
| Ctrl+Shift+N | Change cell background to None | Formatting |
| Ctrl+Shift+B | Change font color to Blue (0,0,255) | Formatting |
| Ctrl+Shift+K | Change font color to Black (0,0,0) | Formatting |
| Ctrl+Shift+R | Change font color to Red (255,0,0) | Formatting |
| Ctrl+Shift+G | Change font color to Green (0,255,0) | Formatting |
| Ctrl+Shift+W | Change font color to White (255,255,255), cell background None | Formatting |
| Ctrl+Shift+Alt+M/Q/Y | Change formatting to “Month” 0 / “Quarter” 0 / “Year” 0 for period header | Formatting |
| Ctrl+Shift+Alt+X | Change formatting to 0.00”x” for DSCR and Equity Multiple | Formatting |
| Ctrl+Shift+< | Go to the first visible worksheet | Navigation |
| Ctrl+Shift+> | Go to the last visible worksheet | Navigation |
| Ctrl+Shift+? | Unhide all worksheets | Navigation |
| Ctrl+Alt+A | Select all worksheets | Navigation |
| Ctrl+Alt+Right/Left/Up/Down arrow | Move the cursor 12 cells right/left/up/down; for quick scrolling | Navigation |
| Ctrl+Shift+Alt+D | Autofill formula down (assumes column to the left is not empty) | Functionality |
| Ctrl+Shift+Alt+R | Autofill formula right (assumes row above is not empty) | Functionality |
| Ctrl+Shift+Alt+V | Convert formulas to values in selected cells | Functionality |
| Ctrl+Shift+Alt+F | Copy as formulas-only the top-left formula in a range across the entire range | Functionality |
Using the CRE Functions (List of Functions)
This add-in includes various custom functions specific to both the add-in (i.e. the Geocoding specific functions) and helpful for real estate financial modeling.
It’s important to note that these functions ONLY work when the ‘Excel 4 CRE’ add-in is installed. If you share a workbook with a user who doesn’t have the Excel 4 CRE add-in, the cells containing these functions will show an error. Endures that when using these functions, you don’t intend to share the workbook with other users who don’t have the custom add-in installed.
| FUNCTION | ACTION | LOGIC |
| =FINDCOORDINATES() | Finds latitude and longitude coordinates from an address via Google Geocoding API | =FINDCOORDINATES([address city state]) |
| =FINDLATITUDE() | Finds latitude from an address via Google Geocoding API | =FINDLATITUDE([address city state]) |
| =FINDLONGITUDE() | Finds longitude from an address via Google Geocoding API | =FINDLONGITUDE([address city state]) |
| =FINDADDRESS() | Finds address from a coordinates via Google Geocoding API | =FINDADDRESS([latitude],[longitude]) |
| =EMX() | Calculates the Equity Multiple of a Net CF line; assumes no mid-hold capital event | =EMX([net CF line]) |
| =ERRCHECK() | Checks if two ranges are equal to one another, if so it outputs OK, otherwise Err | =ERRCHECK([range1],[range2]) |
| =ISNOTBLANK() | Checks if a cell is blank, and if so returns a blank cell, otherwise executes some code | =ISNOTBLANK([cell ref],[some code]) |
| =AVERAGE_WEIGHTED() | Averages a given range, using a seperate range as the weight (i.e SUMPRODUCT/SUM) | =AVERAGE_WEIGHTED([average range], [weight range]) |
Using the ‘Advanced Find’ Feature
Activating Advanced Find:
To initiate the Advanced Find feature, navigate to the ‘Custom Shortcuts/Functions’ section located on the 4-CRE custom ribbon and click the ‘Advanced Find’ button. This action will launch the Advanced Find tool, designed to enhance your search capabilities within Excel workbooks.
Using Advanced Find:
- Initiate Search: Upon clicking the ‘Advanced Find’ button, an input box will appear. Enter the word or value you wish to search for across the entire workbook. This tool is capable of locating your search term within cell contents, formulas, and even worksheet names, providing a comprehensive search experience.
- Review Results: After entering your search term and initiating the search, the Advanced Find tool will process your request and display all instances of the term found in a user-friendly list within the Advanced Find dialog.
- Navigate to Results: To navigate to a specific instance from the search results, simply click on the desired item within the list. This will highlight the selection.
- Go to Selection: With an item highlighted, click the ‘Go to Selection’ button within the Advanced Find dialog. The tool will automatically take you to the exact location of the selected term within the workbook, whether it’s in a cell or a worksheet name.
- Close Advanced Find: Once you’ve finished with your search and navigation tasks, you can close the Advanced Find dialog by clicking the ‘Close’ button or the ‘X’ at the top right corner of the dialog.
Tips for Effective Searching:
The Advanced Find tool is case-insensitive, meaning it does not differentiate between uppercase and lowercase letters, making your search more flexible. You can search for partial words or phrases; the tool will find any instance that includes the entered sequence of characters.
Section: ‘CRE Content’
Using the ‘Create Date Header’ Feature
Nearly every real estate financial model includes a date header. This header includes the ending date of each period, the period type (i.e. month, quarter, year), the number of each period, and the year of each period. To speed the creation and duplication of date headers in CRE models, the add-in includes a feature that quickly creates a date header for you.
To use this feature:
First, make sure you have an input for ‘Analysis Start Date’ and that a date is entered into that cell.
Then, with beta version 0.5 or later installed, go to the 4-CRE ribbon item. Under the ‘CRE Contents’ section, click the ‘Create Date Header’ button. A series of boxes will appear that will ask for information specific to the model you’re building. Upon answering those questions a two or three row date header will be created.
Options include:
- Select an Analysis Start Date on which the date will be based
- Choose whether periods are monthly, quarterly, or annual
- Choose the analysis length
- Choose where to add the header
If you choose monthly or quarterly periods, three rows will be added: i) a Period Ending row with a series of ending date for each period; ii) an ‘Analysis Month/Quarter/Year’ row, and iii) an ‘Analysis Year’ row where periods are months or quarters.
The module adds dynamic formulas, so you can copy and paste the header in other parts of your model. Additionally, the header automatically updates based on the date entered in the ‘Analysis Start Date’ input cell.
Using the ‘Residual Land Value’ feature
This feature helps the user to quickly calculate the residual land (or property) value for an investment. A few years ago we created a tutorial for how to calculate the value of land/property based on some target return (i.e. Residual Land Value analysis). To further simplify that analysis, we’ve added a feature within the CRE Content section of the Excel 4 CRE add-in called ‘Residual Land Value’.
To use the tool:
- Click the ‘Residual Land Value’ button.
- A series of dialog boxes appear that guides the user on how to perform the analysis.
- The first dialog box asks for the name of the return metric that will be solved for. So, for instance you might want to find the land value where the Equity Multiple of the investment is 2.0X. If that were the case, you’d enter ‘Equity Multiple’ in the first box.
- The second dialog box asks the user to select the cell that contains the selected return metric (e.g. the box that contains the ‘Equity Multiple’ output).
- The third dialog box asks the user to select the cell that contains the Land Price or Land Value (could also be the property purchase price).
- The last box asks the user to enter the return target (e.g. 2.00 for Equity Multiple).
- Once the final input has been entered, the tool returns a result. With that result in mind, the user is given the option to keep that new Land Value or revert to the original.
Using the ‘Modeling Modules’
In beta v0.9 we introduced a new feature: Modeling Modules (I created a video showing how I used ChatGPT to create this feature). This feature instantly drops into your workbook real estate financial models/modules that would generally take several hours to build on your own.
You can find a dropdown menu to use this tool in the CRE Content section. In the coming months/years, we’ll add more Modeling Modules. In the first release, we’ve included a one-click two-tier equity waterfall module, and a one-click real estate DCF model.
To add a module instantly to your Workbook:
- Select the Modeling Module you’d like to create from the CRE Content section.
- A box will appear confirming that you want to add the module and that depending on the size of your Workbook it could take one second to several minutes to build the module.
- If you select ‘Yes’ to add the module, the tool will ask you to name a new worksheet where the module will be built.
- Once you’ve entered a name for the worksheet, click ‘OK’ and you’ll watch as the module is automatically built.
Once the model/module is added to your Workbook, modify it and/or connect with your existing analysis to save hours of time.
Using the ‘Custom CRE Formulas’
In beta v0.9 we also introduced a new feature: Custom CRE Formulas. This feature simplifies the creation of common formulas specific to commercial real estate. The list of formulas we’re adding come from our bite-sized CRE lessons series. This is generally a beginner feature, that holds the users hand in writing formulas such as Debt Yield, Equity Multiple, and dozens more to be added in the coming months/years.
To use this feature to write custom CRE formulas, you have two options:
- Make sure your cursor is in the cell where you want to add the formula.
- Select the Custom CRE Formula you’d like to create from the CRE Content section.
- A series of dialog boxes will appear prompting the user to select the cells that contain the values necessary to write the formula.
- Once the user has selected the relevant cells, the tool will write the CRE formula and add it to the cell where the user’s cursor was originally located.
The second option is to access the custom CRE formulas via a keyboards shortcut:
- Make sure your cursor is in the cell where you want to add the formula.
- Click Ctrl+Alt+F.
- A custom window will appear with a list of the custom CRE formulas currently available.
- Select the custom CRE formula you’d like.
- A series of dialog boxes will appear prompting the user to select the cells that contain the values necessary to write the formula.
- Once the user has selected the relevant cells, the tool will write the CRE formula and add it to the cell where the user’s cursor was originally located.
Section: ‘Formula Intelligence Toolkit’
The Formula Intelligence Toolkit is a comprehensive suite of tools designed to enhance your ability to audit, analyze, and manage complex formulas within your Excel workbooks. Tailored specifically for the needs of commercial real estate professionals, this toolkit offers powerful features that streamline the process of formula management, helping you ensure the accuracy, efficiency, and reliability of your financial models.
Formula Error Check
The Formula Error Check feature allows you to quickly identify and resolve common formula errors across your active worksheet, ensuring the accuracy and reliability of your financial models. When activated, this tool scans the worksheet for various types of errors, such as #DIV/0!, #REF!, and other common issues. It also flags complex nested IF statements, external references, and overly long formulas that could lead to errors or difficulties in debugging.
To use this feature, click the ‘Formula Error Check’ button in the 4-CRE ribbon. A prompt will ask if you want to proceed with the error check on the active worksheet. Once confirmed, the add-in generates a detailed report of any detected errors, including recommendations for resolution, on a new worksheet named “Error_Check.” This comprehensive overview helps you quickly address potential issues, improving the accuracy and integrity of your workbook.
Advanced Formula Auditing
The Advanced Formula Auditing feature provides a powerful tool for analyzing and understanding complex formulas within your worksheets. This feature allows you to inspect the formula in a selected cell, along with its precedents (cells that the formula references) and dependents (cells that reference the formula). By visualizing these relationships, you can better understand how data flows through your model and identify any potential issues or inefficiencies.
To use this feature, select a cell containing a formula and click the ‘Advanced Formula Auditing’ button in the 4-CRE ribbon. The Formula Intelligence Toolkit will open, displaying the selected formula along with lists of all precedent and dependent cells. You can navigate directly to any of these cells by selecting them in the list, which helps in tracing and debugging complex formulas. This tool is essential for maintaining the accuracy and integrity of your financial models by ensuring that all formula dependencies are clearly understood and properly managed.
SECTION: ‘AI TOOLKIT’
The ‘Excel 4 CRE – AI Toolkit’ provides powerful, AI-driven enhancements designed specifically to streamline and improve your workflow within Excel. Leveraging AI, these intuitive tools offer real estate professionals rapid formula explanations, AI-generated formulas, and practical Excel guidance—all integrated seamlessly within your Excel workbook.
In January 2026, we released a free custom AI solution that no longer requires the user to enter a Claude API key.
AI Features:
Feature #1: Explain Formula
The Explain Formula feature provides clear, concise, step-by-step explanations of complex Excel formulas, directly within your workbook.
How to use:
- Click ‘AI Features>Explain Formula’ on the 4-CRE ribbon.
- When prompted, select the cell containing the formula you wish to understand.
- Enter a short, descriptive label to provide context (e.g., ‘Yield-on-Cost’).
- Click OK. AI generates a detailed, plain-English explanation of the selected formula, inserting the result directly into a comment within the cell.
This tool significantly enhances formula readability and helps you clearly understand complex calculations in your financial models.
Feature #2: Formula Helper
The Formula Helper empowers you to effortlessly generate accurate Excel formulas using natural language descriptions, saving significant time and effort in financial modeling.
How to use:
- Select the cell where you want the new formula inserted.
- Click ‘AI Features>Write Formula’ on the 4-CRE ribbon.
- Enter a clear, concise description of the calculation you need (e.g., “Sum cells B3:B10 and multiply by cell C3”).
- Click Submit. AI will instantly generate and insert the formula directly into your selected cell.
This feature simplifies complex formula creation, ensuring accuracy and efficiency in your modeling process.
Feature #3: Ask an Excel Question
The Ask an Excel Question feature allows you to quickly obtain expert-level Excel guidance directly within your workbook, enhancing your productivity and understanding.
How to use:
- Click ‘AI Features>Ask an Excel Question’ on the 4-CRE ribbon.
- Enter your concise, Excel-related question into the provided prompt (e.g., “What is the difference between IRR, XIRR, and MIRR in Excel?”).
- Click Submit. AI provides clear, practical guidance immediately displayed within Excel, without leaving your workbook.
This tool ensures quick access to precise, professional Excel advice, helping you master advanced Excel techniques.
Section: ‘Add-in Settings’
Version Notes
This feature was added in beta v0.6. This add-in is regularly updated. As of beta v0.6, the file name does not change from one version to the next. Therefore, to allow the user to quickly see which version they’re using we’ve added a ‘Versions Notes’ button to the Settings section.
Click the ‘Version Notes’ button and a dialog box appears that provides information on which version is currently running.
Add-in Settings
To help Excel 4 CRE users access add-in settings and A.CRE resources quickly, we’ve added an ‘Add-in Settings’ menu in the Settings section. The dropdown menu provides links add-in documentation, written/video instructions for using the add-in, details for accessing the add-in code, and link to learn more about our real estate financial modeling training program. Simply click the ‘Add-in Settings’ button, select any of the items in the dropdown menu, and either the webpage or a dialog box with instructions will appear.
Startup Settings
The Startup Settings feature allows you to control whether the cursor resets to cell A1 on all worksheets when opening the workbook. When enabled, this ensures a consistent starting point for all worksheets, enhancing navigation. By default, upon installing the add-in for the first time, the Reset Cursor feature is set to disabled. To enable or disable this feature, click the ‘Startup Settings’ button in the 4-CRE ribbon. In the dialog box that appears, click the button to either ‘Enable Reset Cursor’ or ‘Disable Reset Cursor’. The current status is displayed, indicating whether the feature is currently enabled or disabled.
Uninstalling the Add-in
To make uninstalling the add-in simple, we added an ‘Uninstall’ feature within the 4-CRE ribbon ‘Settings’ section. Simply click the ‘Excel 4 CRE Settings’ button, select ‘‘Uninstall Add-in’, answer ‘Yes’ to the question whether to uninstall the add-in, and the add-in will be deactivated.
Note that the 4-CRE Ribbon item will not disappear until you close Excel and reopen it.
We Hope You Find the ‘Excel 4 CRE’ Add-in Useful
There you have it! We hope this new Excel add-in helps make your real estate financial modeling tasks more efficient and enjoyable.
As always, we welcome your feedback and suggestions to make this add-in even better. Happy modeling!
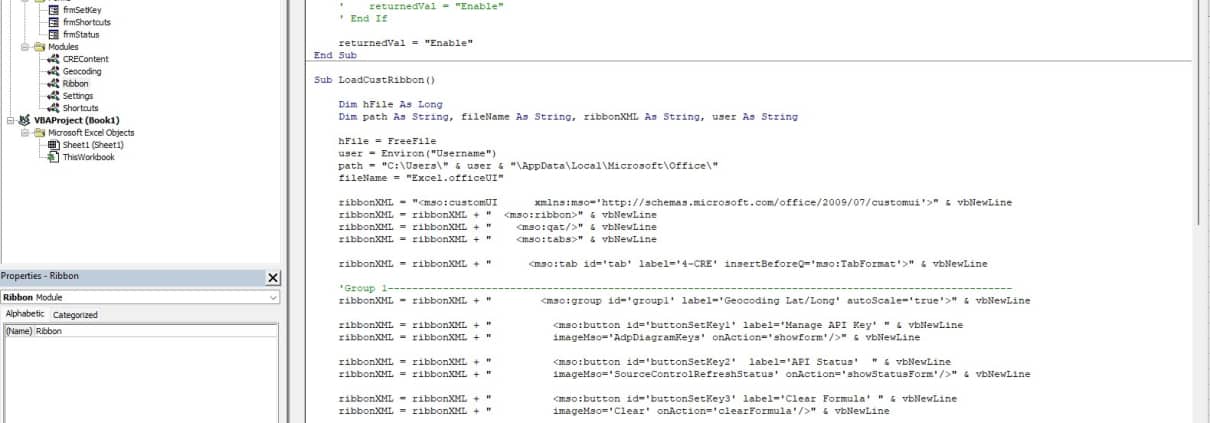
A screenshot of the backend code for the add-in. All code is publicly visible and editable.
Frequently Asked Questions about the Excel 4 CRE Add-in
Version Notes
Given the complexity of this project, version notes together with software documentation are stored on a publicly visible Google Doc. You can find the changelog (i.e. version notes) together with that documentation by clicking here.


