A.CRE 101 – Create Smart Drop-Down Menus in Real Estate Modeling
One Excel feature real estate financial modeling professionals use often is the data validation list. Where data validation is a method of limiting the possible inputs of a cell, the data validation list limits those inputs to a pre-defined list created by the financial modeling professional.
In real estate financial modeling, these lists are essential to instructing the user as to what inputs are appropriate and thus, limiting the frequency of output errors. To further enhance the effectiveness of these lists, the list itself can be made to be dynamic to changes made by the user.
In this tutorial, I show you – using both text and a video – how to create dynamic lists (i.e. smart drop-down menus) in your real estate financial models. I first give you an example of when you might use this, then I show you how to create a fully dynamic list, and finally I explain how to link your newly created dynamic list to a cell in your workbook.
An Example of When to Use a Dynamic List in Real Estate Modeling
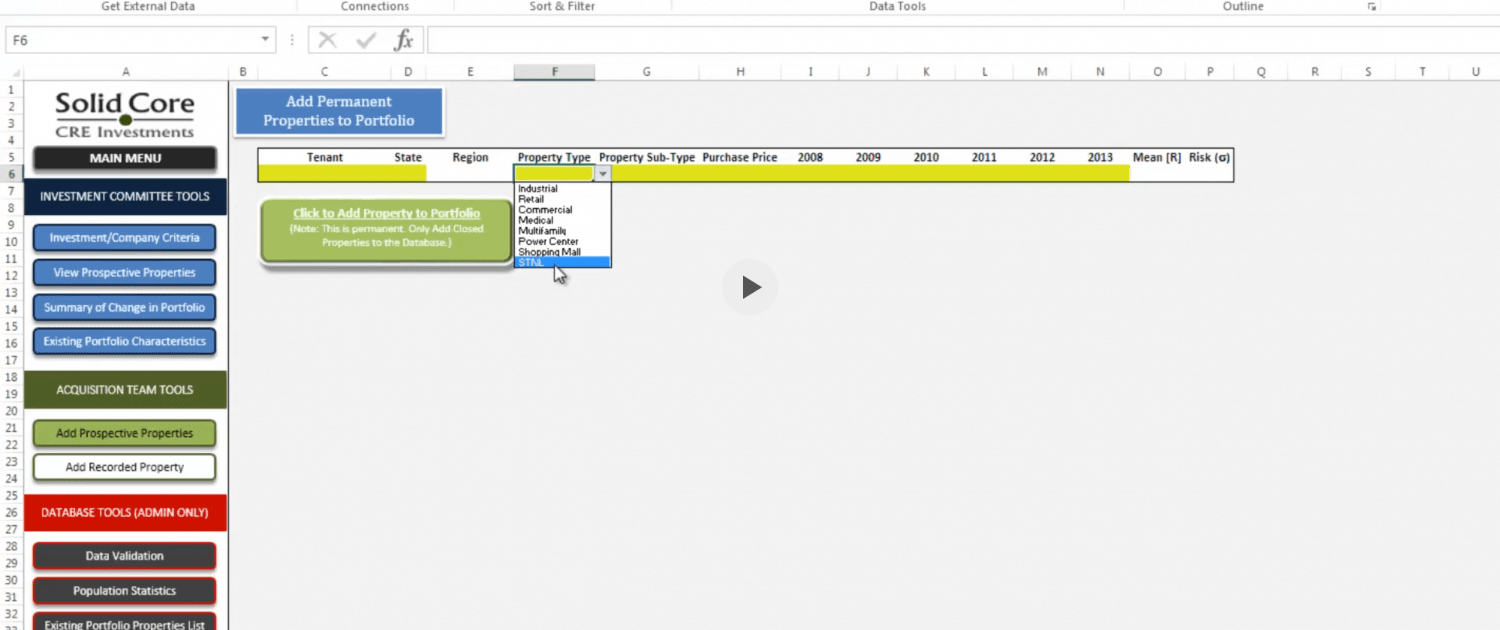
There are an almost infinite number of situations when a dynamic data validation list might be useful in real estate modeling. But for this tutorial, allow me to share just one. A few years ago, I set out to build a portfolio attribution model. In one section of the model, the user enters certain property details and hits an ‘Add Property’ button. A macro then adds that property, together with its property details, from that section into the portfolio’s database.
Among the various propery detail inputs the user must make is that of ‘Property Type’. This is an important input, because the model then reports various metrics by property type; such as AUM by property type, average return by property type, number of properties by property type, etc.
As the creator of the model, it was important to limit the user’s input to a pre-defined list of property types. At the same time, a future administrator of the model to be able to add new property types as the firm’s investment strategy changed. Thus, to accomplish both objectives, I used a dynamic data validation list for my ‘Property Type’ input cell.
Looking to take your real estate financial modeling acumen to the next level, consider joining our A.CRE Real Estate Financial Modeling Accelerator. Click here to learn more.
Step 1: Use the OFFSET() Function with COUNTA() Function to First Create a Dynamic Named Range
If you read my post on creating dynamic charts in real estate modeling, than you’re probably already proficient in creating dynamic named ranges – the first step in creating dynamic data validation lists. If you’re not familiar with the concept, let me explain.
You’ve likely used named cells in Excel (e.g. name cell B8 ‘Cap_Rate’). Well in addition to being able to give any cell a specific name, you can also define a name for a cell range, function, constant, or table. So in the case of a dynamic list, we essentially are defining a name for a dynamic (or changing) cell range.
To do this, we first create a static property type list. Go to a discreet section of your model; I like to create a ‘Data’ tab, hidden from view, where I house my data lists. In this section of your model, find an empty column and type out a list of property types – in cell H2 type ‘Industrial’, in cell H3 type ‘Retail’, and so forth. Be sure the only information in that column is what is found in that list.
Next, we need to define the range. If we were to define a static range, we would simply:
- Select the range that you want to name, including the row or column labels.
- On the Formulas tab, in the Defined Names group, click Define Name.
- In the New Name dialog box, in the Name box, type the name that you want to use for your reference.
- To specify the scope of the name, in the Scope drop-down list box, select Workbook or the name of a worksheet in the workbook.
- To finish and return to the worksheet, click OK.
Note: The current selection is entered by default.

However, the issue with entering a static range is that what if a future admin of the model decides to add another property type to the list? He would have to remember to update the named range to include the newly added property type. Instead, we need to create a dynamic range.
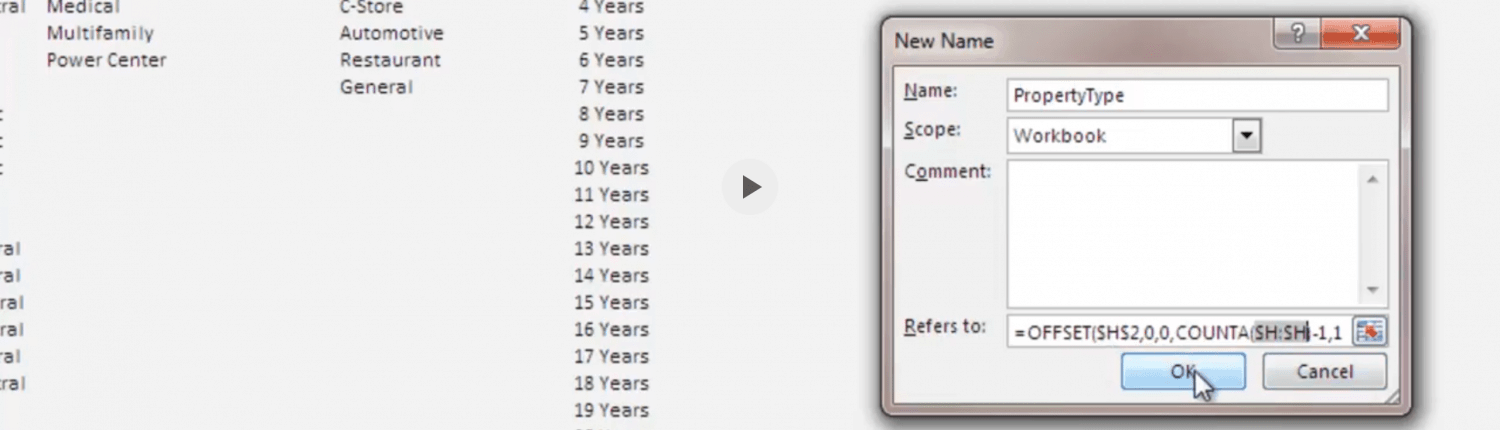
To create a dynamic range, we follow the steps above butt with one important additional step. After typing the name that you want to use for your reference (e.g. ‘PropertyType’), move to the Refers to box and delete the information in that box. Next, type ‘=OFFSET(‘ in the Refers to box and complete the OFFSET() function to define the range.
OFFSET Function Syntax: OFFSET(reference, rows, cols, [height], [width])
For reference, select the cell where you entered your first property type in your list (e.g. cell H2). Set rows and cols to 0. Then, define the [height] of your range using a COUNTA() function.
The COUNTA function counts the number of cells that are not empty in a range – COUNTA(value1, [value2], …)
So in this case, type ‘=COUNT(‘ and then select the entire column that contains your property type list
Close your COUNTA() function and enter 1 for the [width] of your OFFSET() function. You’ve now defined a dynamic range. To finish your dynamic named range and return to the worksheet, click OK. You now have a dynamic named range entitled ‘PropertyType’.
Step 2: Apply Data Validation to Your Property Type Input Cell
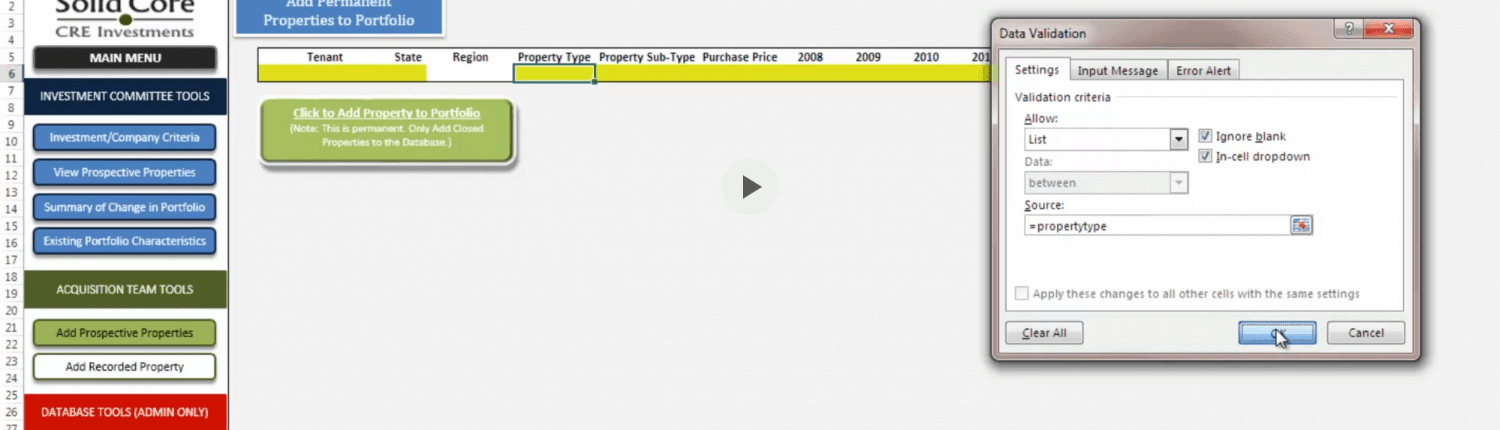
With the tough part done – defining a dynamic named range containing your list of property types – you just need to add data validation to your Property Type input cell. To do this:
- Go to the cell where the user will input property type and select that cell
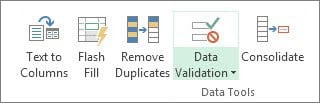
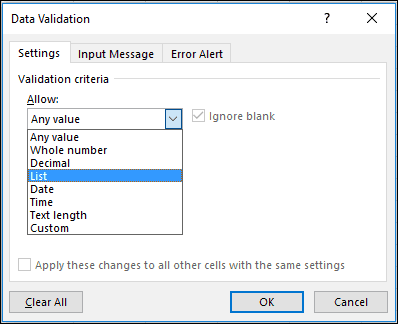
- On the Data ribbon, in the Data Tools group, click Data Validation.

- On the Settings tab, in the Allow box, select List.

- In the Source box, type = followed by the name of your dynamic named range (e.g. =PropertyType)
- Click OK, and your data validation will be applied to that cell.
To test that your list is working, mouse back into the Property Type input cell and an in-cell drop-down arrow should appear. Either click that arrow or use the keystroke CTRL+Down Arrow to open up the list. Does the list contain the property types from your property type list?
To test whether the list is dynamic, go back to your data tab and add another property type to the bottom of the list. Then return to the Property Type input cell and check to see if the newly added property type appears in the list. If it does, congratulations! You’ve successfully created a dynamic data validation list in your real estate financial model!
Video Tutorial on How to Use Dynamic Data Validation Lists in Real Estate Modeling
If you’d like to see the above steps in action, watch the video below. You’ll likely notice a few verbal mistakes (e.g. referring to a column as a row) and the audio quality isn’t stellar; I recorded this video years ago, and the presentation isn’t as polished as I would like! But otherwise the video should provide a good guide for how to use dynamic data validation lists in your modeling.
As always, if you have questions, comments, or would like to just say hello, don’t hesitate to reach out.
Frequently Asked Questions about Creating Smart Drop-Down Menus in Real Estate Modeling
What is a smart drop-down menu in Excel?
A smart drop-down menu is a dynamic data validation list in Excel that automatically updates when values in the source list change. It limits user inputs to predefined options, reducing the chance of errors in real estate models.
Why are dynamic drop-down lists useful in real estate modeling?
They ensure consistency and reduce user error by allowing only specific inputs (e.g. valid property types). Dynamic functionality allows future users to add new options without needing to manually update the validation list range.
How do you create a dynamic named range using OFFSET and COUNTA?
Use the following formula in the “Refers to” field when defining a named range:
=OFFSET(H2,0,0,COUNTA(H:H),1)
This starts at cell H2 and dynamically expands the range based on the number of non-empty cells in column H using COUNTA().
What steps are needed to apply data validation using the dynamic range?
Select the target input cell (e.g. for Property Type)
Go to Data > Data Validation
Set Allow to List
In Source, type =PropertyType (or your dynamic range name)
Click OK – the cell now has a dynamic drop-down menu
How can you test that your dynamic list is working correctly?
After setting up the data validation, add a new item to the bottom of the source list (e.g. a new Property Type in the Data tab). Then return to the input cell and check if the new item appears in the drop-down list. If it does, your dynamic list is working.
What is an example use case for this technique in a real estate model?
In a portfolio attribution model, a Property Type input cell uses a dynamic drop-down to ensure users only select valid property types. This supports accurate aggregation of metrics like average return or AUM by property type.
Where should the source list for a smart drop-down menu be stored?
It’s best practice to place source lists on a dedicated ‘Data’ tab, often hidden from view. This keeps data clean and centralized, making it easier for users or model administrators to maintain.
Can users update the list in the future without editing the formula?
Yes. As long as new values are added to the column defined by the dynamic named range, the list will automatically include them in the drop-down menu without needing to edit the formula.
Where can I see this method demonstrated?
A video tutorial is included in the post, showing the full step-by-step process of creating and testing a smart drop-down menu in a real estate model, including dynamic range setup and data validation.


